Thank you for your participation in our transit time measurement!
Please find below some information concerning the QuoTrax®-Box. Via this box we can measure the exact delivery time of a test letter. The handling of this box is really simple. Hereafter, you will find some guidelines concerning the correct installation of the box, which we kindly ask you to read carefully.
If you have questions or need more information, please contact us by email
(unex-panel@quotas.de) or via “My messages” on your weblogin.
We will be happy to assist you.
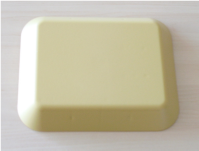
The QuoTrax®-Box
The antenna in the QuoTrax®-Box sends out a signal every 20 minutes. With the help of this technology the delivery date and time of the test letters containing a Transponder is recorded on the QuoTrax®-Box.
In order that the Transponder can receive the signal, it is very important that the QuoTrax®-Box is placed in the letter box in such a way that the test letters will lie on or right next to the QuoTrax®-Box.
Therefore, please leave the test letters on or right next to the QuoTrax®- Box for at least 20 minutes so that the data can be captured.
1 – Recharging of the QuoTrax®-Box
- Please recharge the box before the first installation.
- As soon as the charge level of the battery is below a certain limit (approximately twice per year) you will receive an email from us.
- After receipt of this email, we would kindly ask you to collect the QuoTrax®-Box from your letter box as soon as possible. Please do not wait too long as otherwise the QuoTrax®-Box will switch off automatically.
- VERY IMPORTANT: Please make sure that the QuoTrax®-Box is turned off before you recharge it. (The switch needs to be turned to “OFF”).
2 – Preparation of the charging station
- Along with your QuoTrax®-Box you receive a charging station from us.
- As soon as the charging station is plugged in (please use the cable provided) a green light is turned on in the middle of the lower bar.
3 -Placing of the QuoTrax®-Box
The correct placing of the QuoTrax®-Box on the charging station is very important in order to charge the QuoTrax®-Box successfully.
Please note the following:
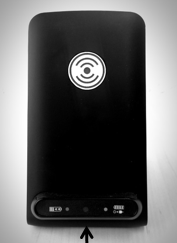
- The QuoTrax®-Box has to stand upright, with its back towards the charging station.
- The designated areas (marked with the circle symbol) on the QuoTrax®-Box and charging station need to face each other.
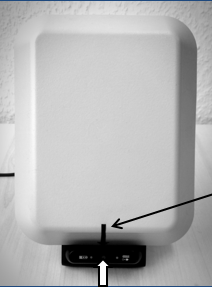
- The QuoTrax®-Box has to be placed in the middle of the charging station. The arrow on the front side of the QuoTrax®-Box needs to point to the light in the middle of the lower bar of the charging station.
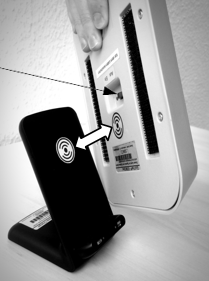
The light will change permanent to BLUE as soon as the QuoTrax®-Box has been placed correctly.
4 – Does the QuoTrax®-Box recharge correctly?
- The light is permanently BLUE when the QuoTrax®-Box has been placed correctly.
- Please wait for 10 seconds to check if the light is permanently BLUE. In case the light just flashes blue or changes to green the position is incorrect.
- It may take several hours to recharge the battery completely. We recommend to recharge the QuoTrax®-Box at night.
5 – The QuoTrax®-Box is recharged
- As soon as the QuoTrax®-Box is recharged completely, the light will flash alternately BLUE and GREEN.
- Now you can install the QuoTrax®-Box in your letter box.
6 – Activating the QuoTrax®-Box
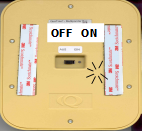
- Activate the QuoTrax®-Box by shifting the switch on the back of the box towards the note „ON“.
- The light will flash green for about 10 seconds. Right after, the light will go off. The QuoTrax®-Box is activated.
- Please do not change the position of the switch anymore!
7 – Preparation
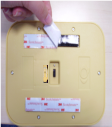
- To affix the QuoTrax®-Box you find two 3M® strips on the back of the box.
- Remove the protective foil and place the QuoTrax®-Box in your letter box as described in step 3.
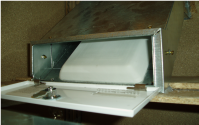
8 – Installation and Positioning
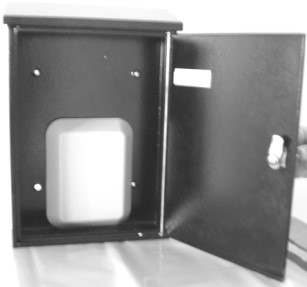
a) Letterbox
Setting Up:
If your letter box is big enough please place the QuoTrax®-Box horizontally on its bottom. Please affix the box with the self-adhesive 3M® strips.
Alternative set up:
If the optimal placing is not possible please install the QuoTrax®-Box in the lower middle part on the back of the letter box.
b) Letter Box Facility
Setting Up:
Please install the QuoTrax®-Box in the lower part of the letter box so that the test letters will lie very close to the QuoTrax®-Box.
VERY IMPORTANT: Please switch “ON” the QuoTrax®-Box before you install it in your letter box.
Further information:
The QuoTrax®-Box and the charging station are the property of Quotas GmbH and must be sent back on demand. It is not allowed to open the QuoTrax®-Box.
Thank you very much for your assistance!
Your Quotas Team